 Connect with Google
 Connect with Facebook
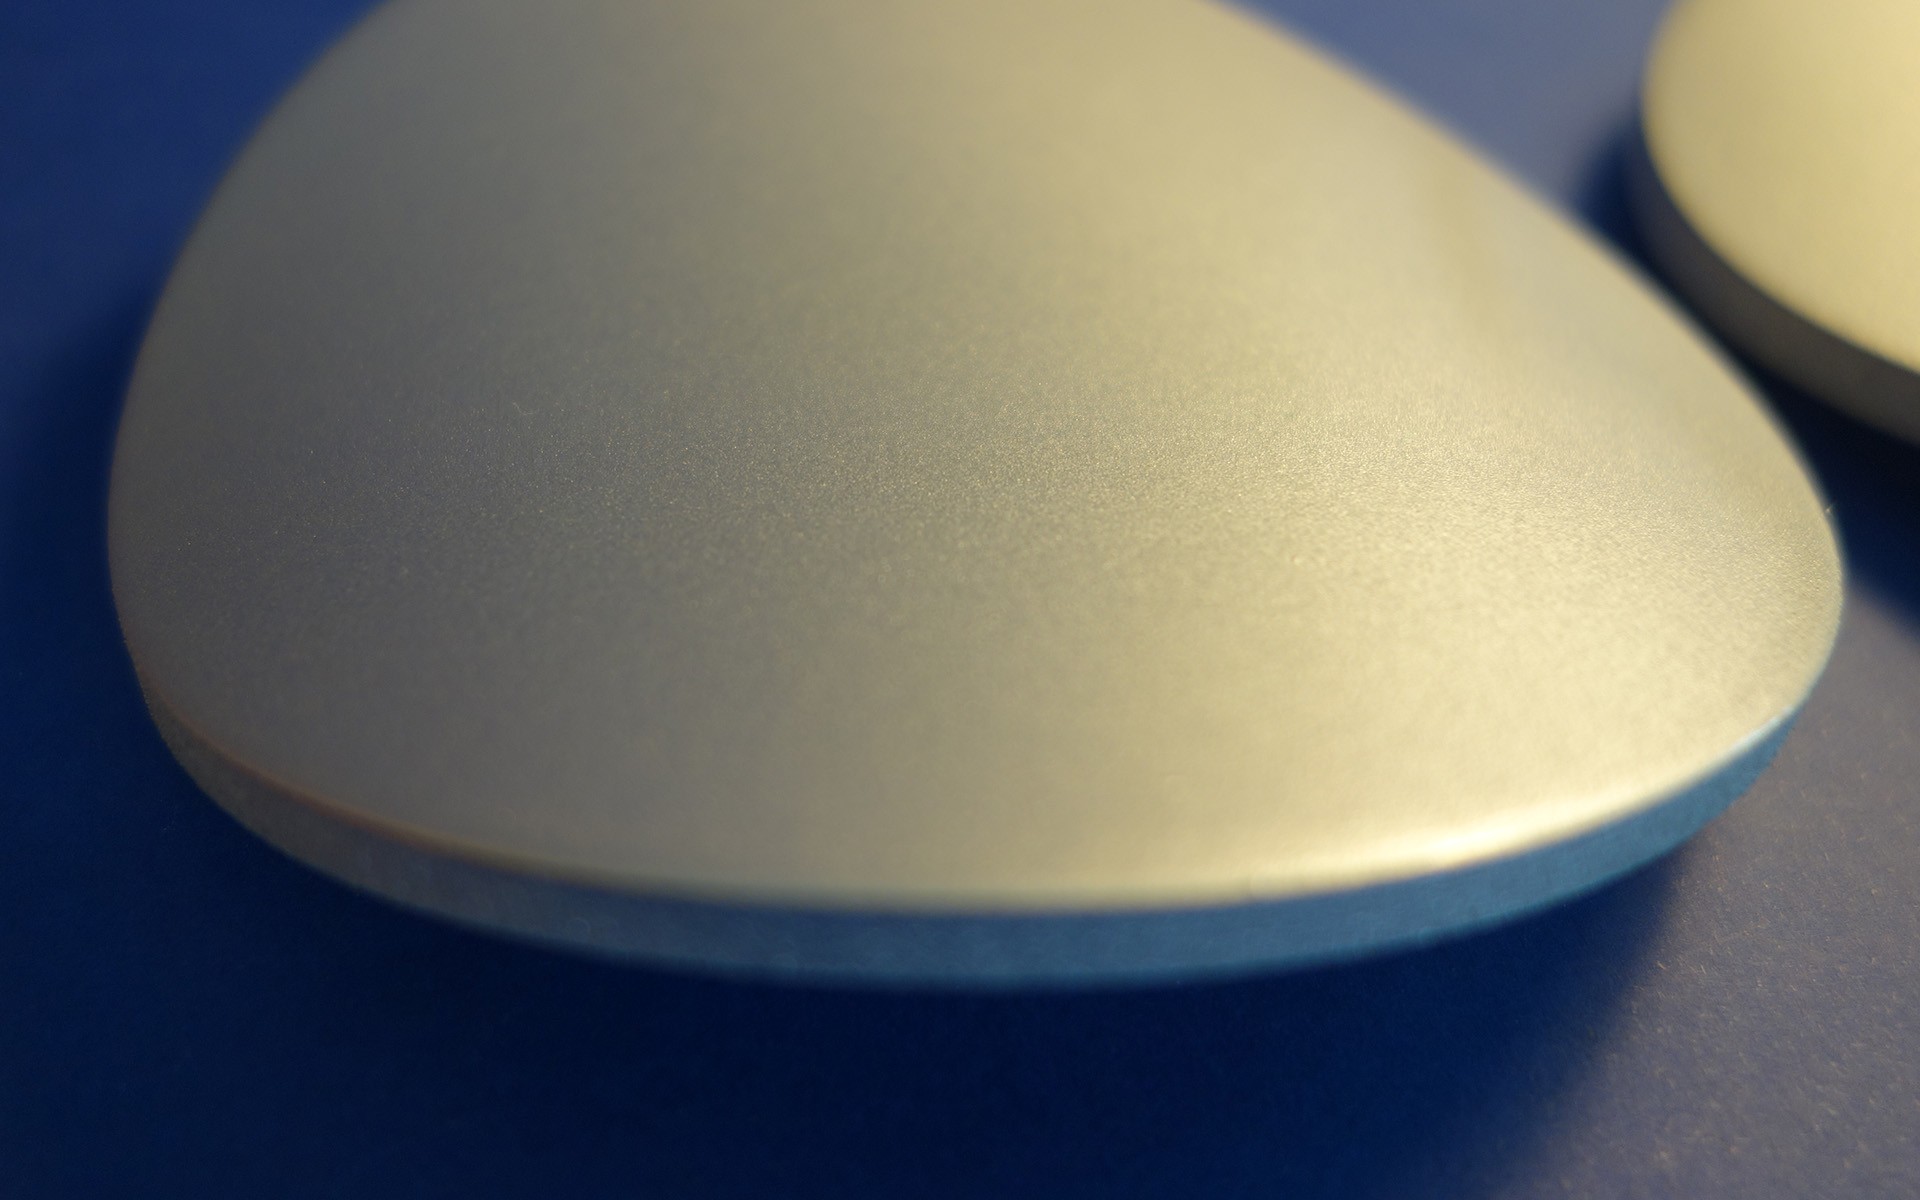
DIY Tutorial: How to get a finished product look for your 3D printed parts
Posted By Antu Nehuen on Jul 19, 2017 | 5 comments
As you may have read on of our post about 3D printing uses, ever since the first 3D printing technologies started to emerge, there has been one true undisputed application for it: Prototyping. 3D printing back then and especially today with its ever increasing speed and versatility has turned into the number one tool when it comes to quickly materializing an object or idea. Today in a matter of days or sometimes even hours we can iterate over several versions of our object till it’s as perfect as we may need it to be. Yet, there’s always that final step that gives us away, telling everyone that this is a 3D printed object and not a finished product. It will take some time and work but this changes today. We are going to turn three 3D printed sample-objects into parts that look like something you could perfectly have found boxed at your nearest retail store, using ABS, Polyamide and Resin materials.
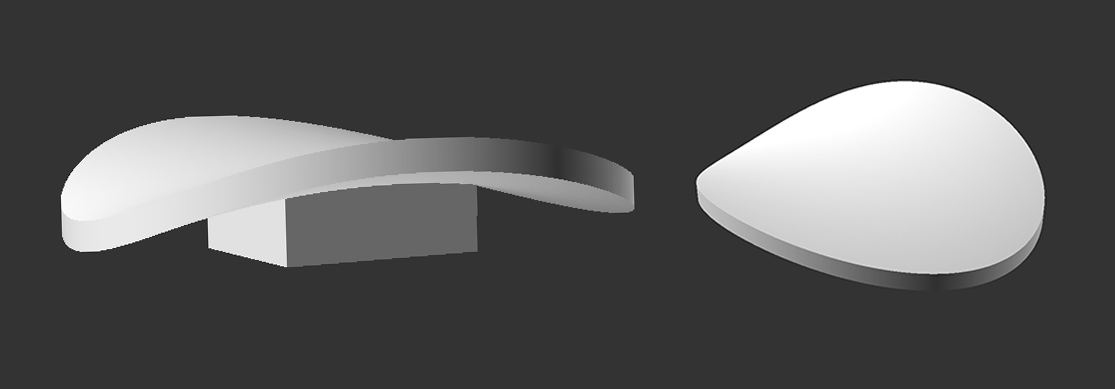
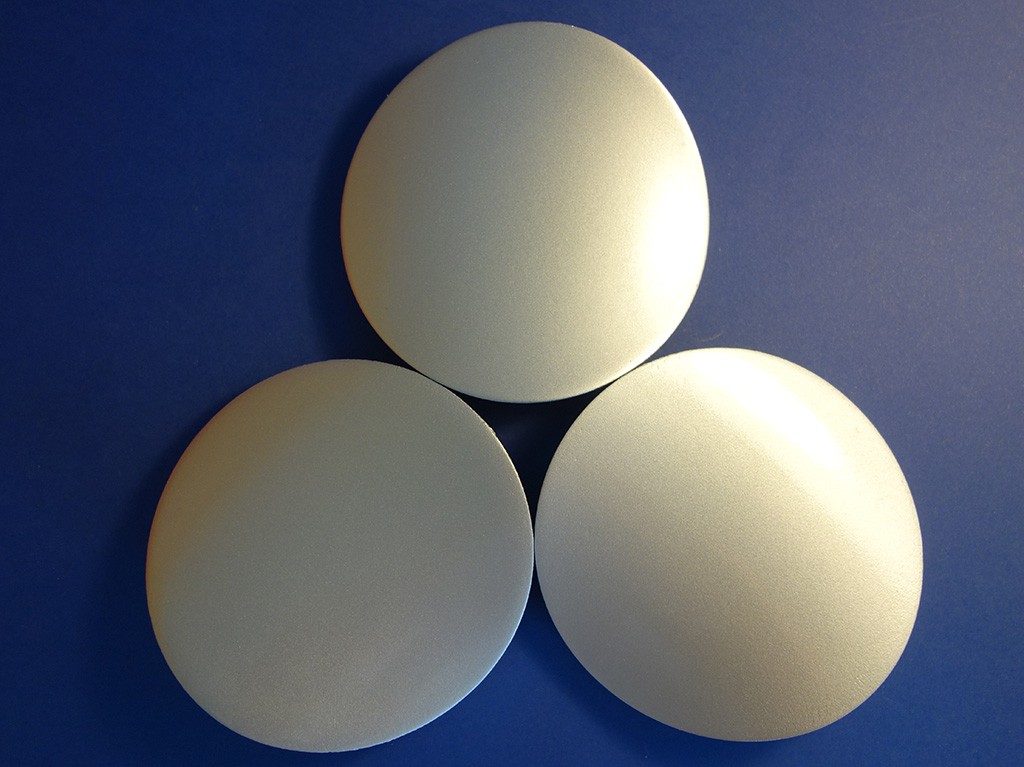
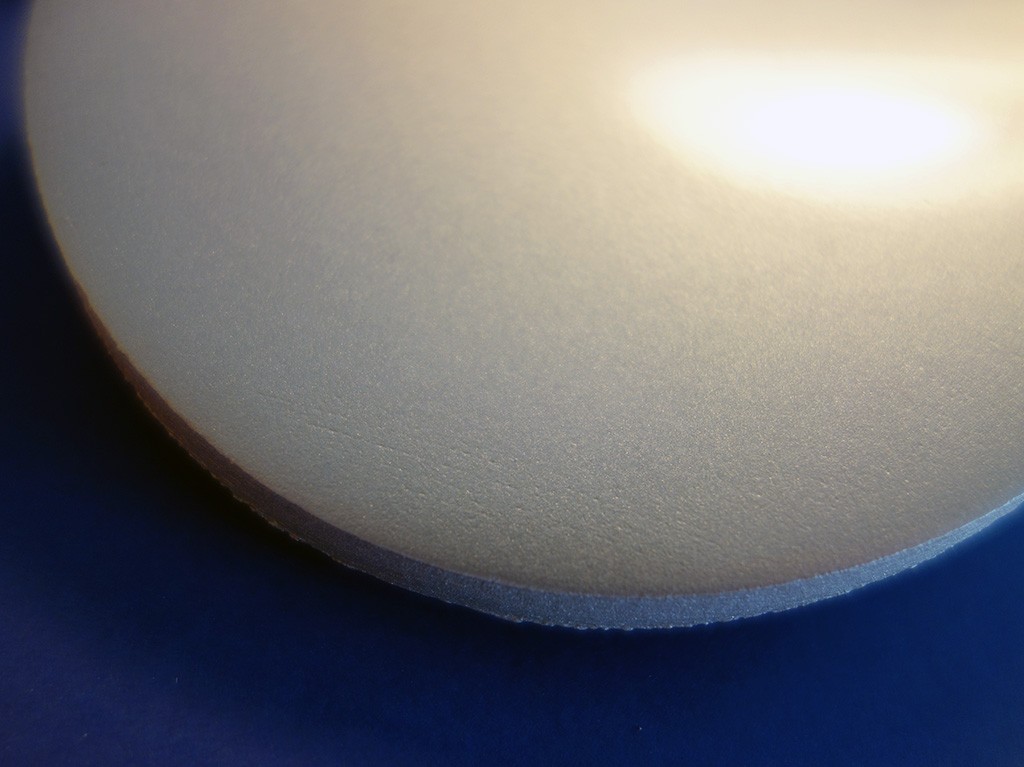
The objects
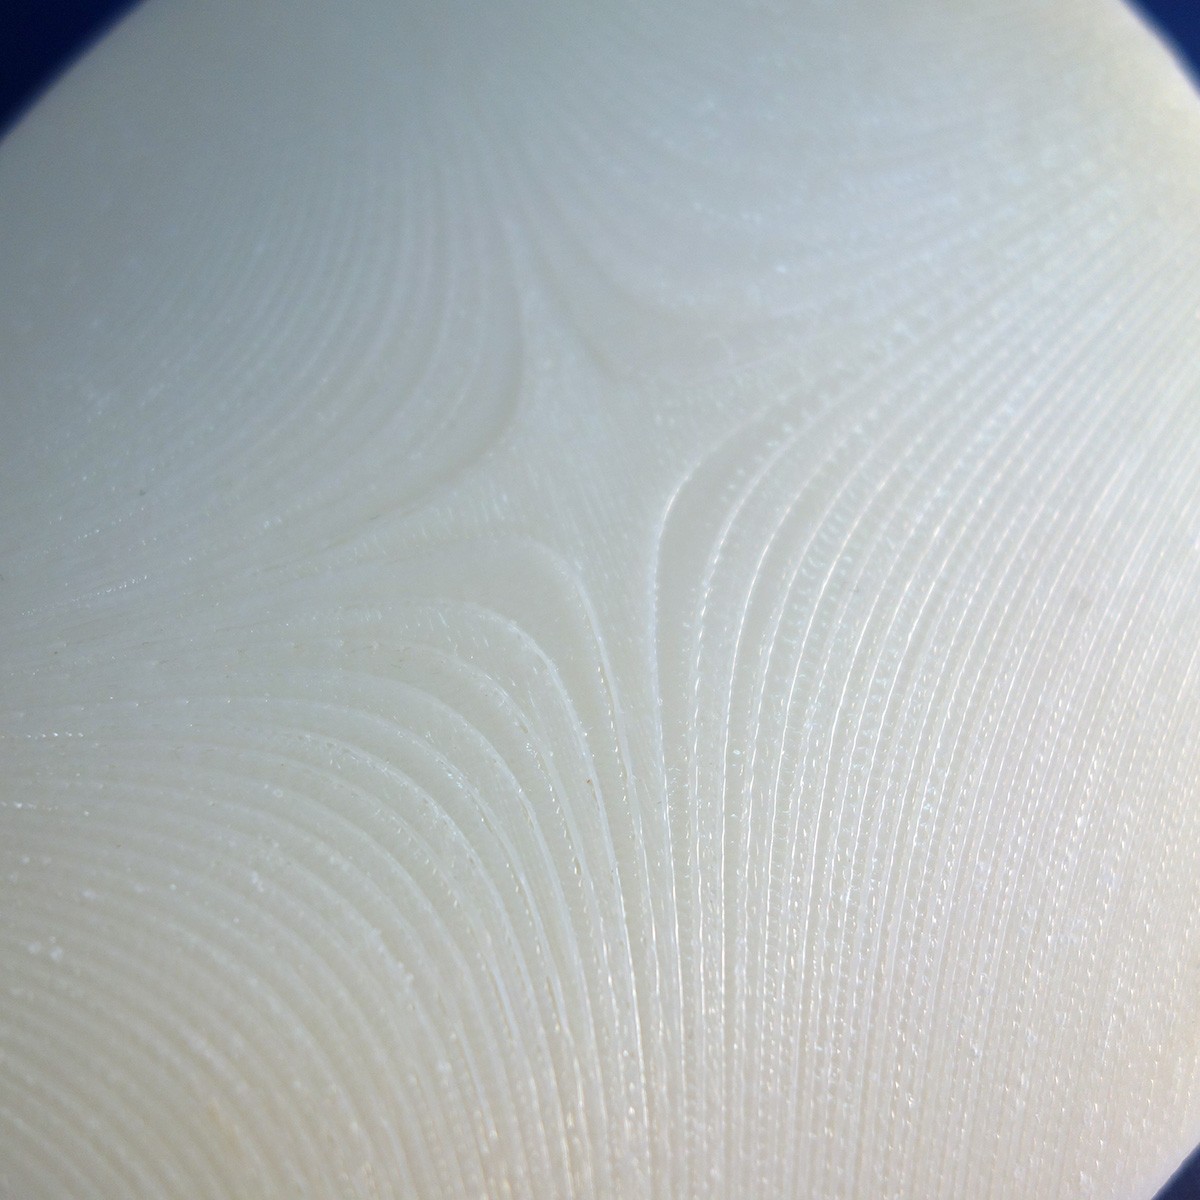
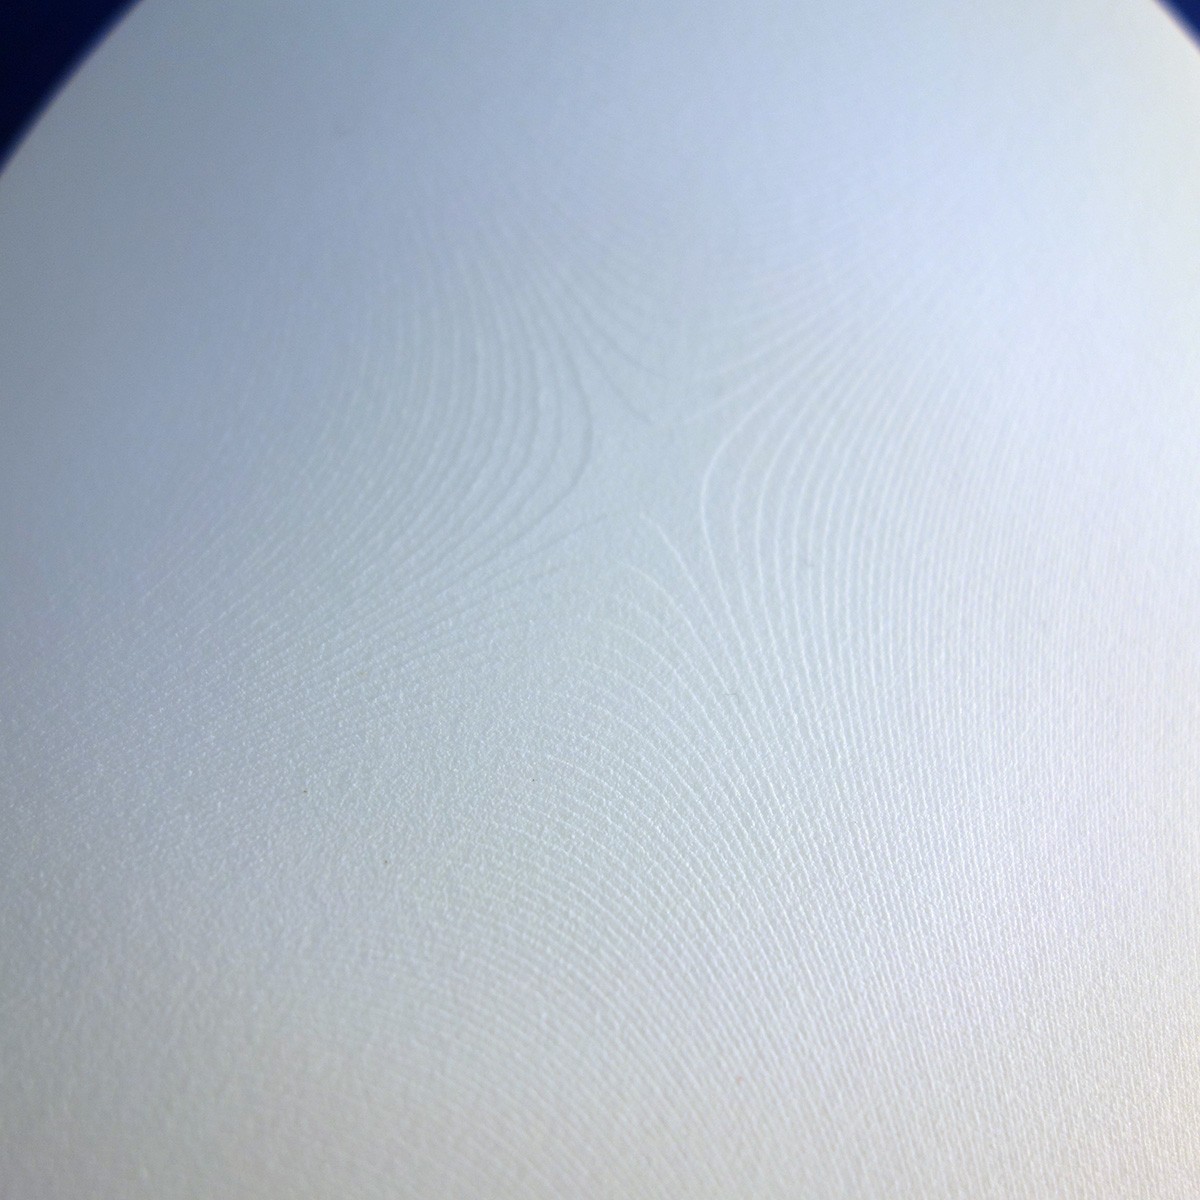
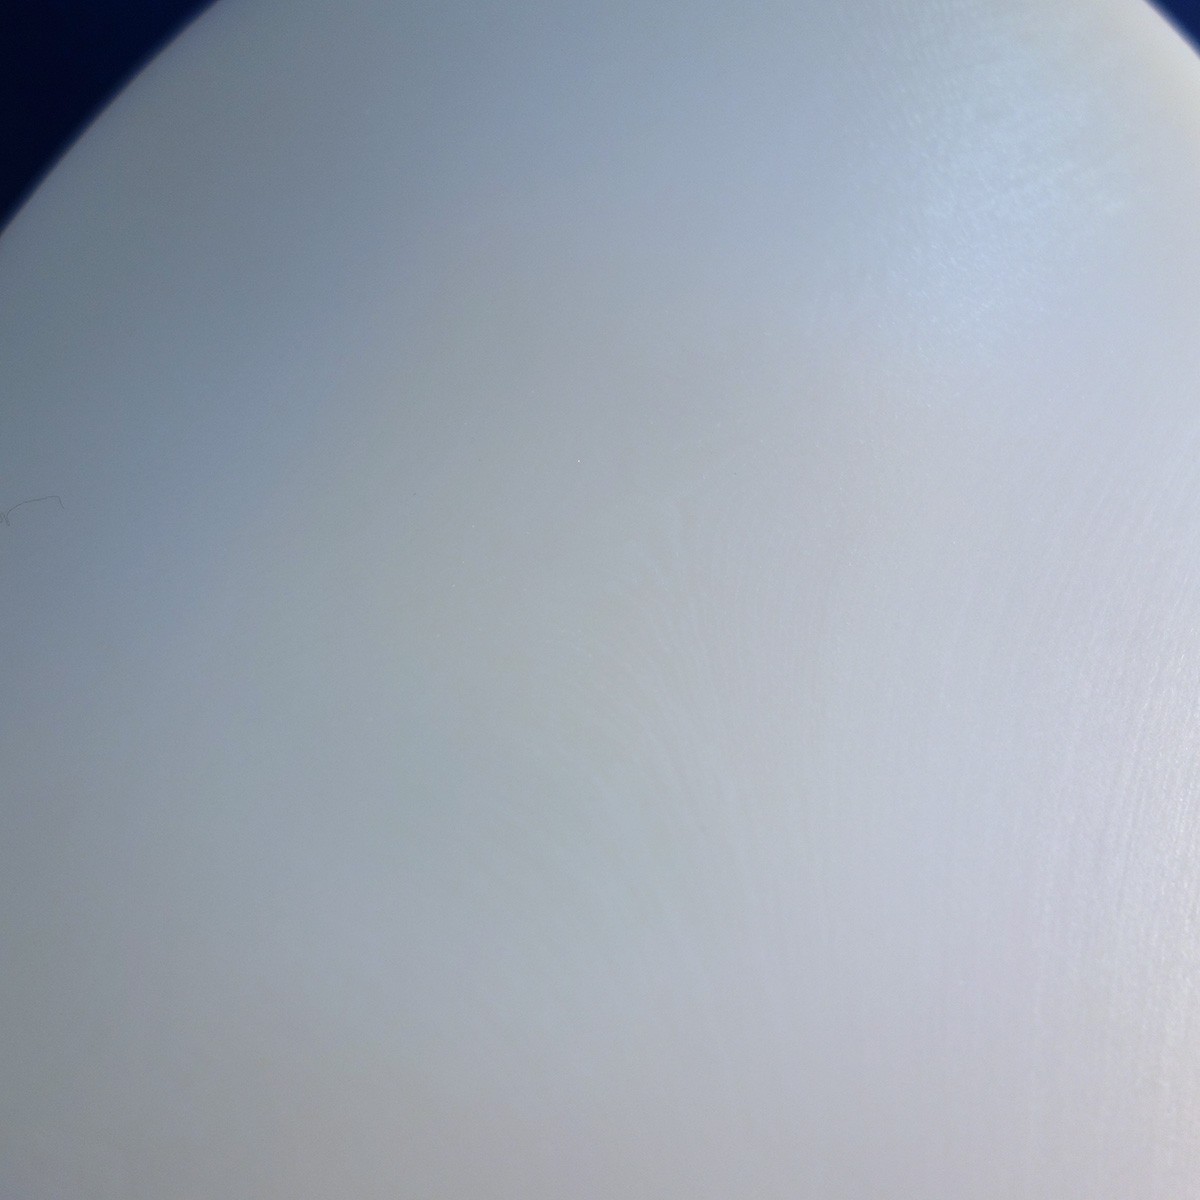
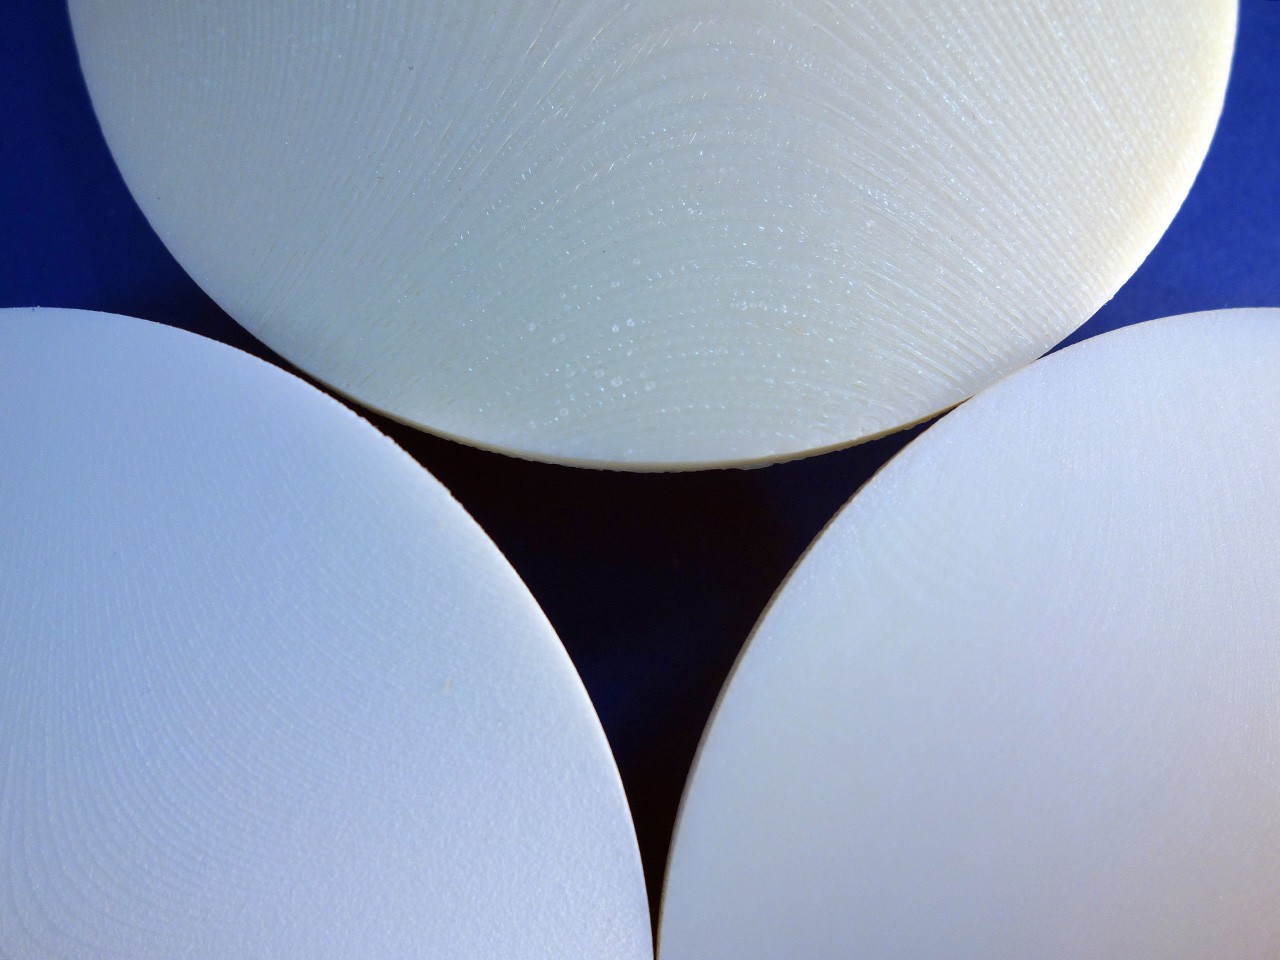
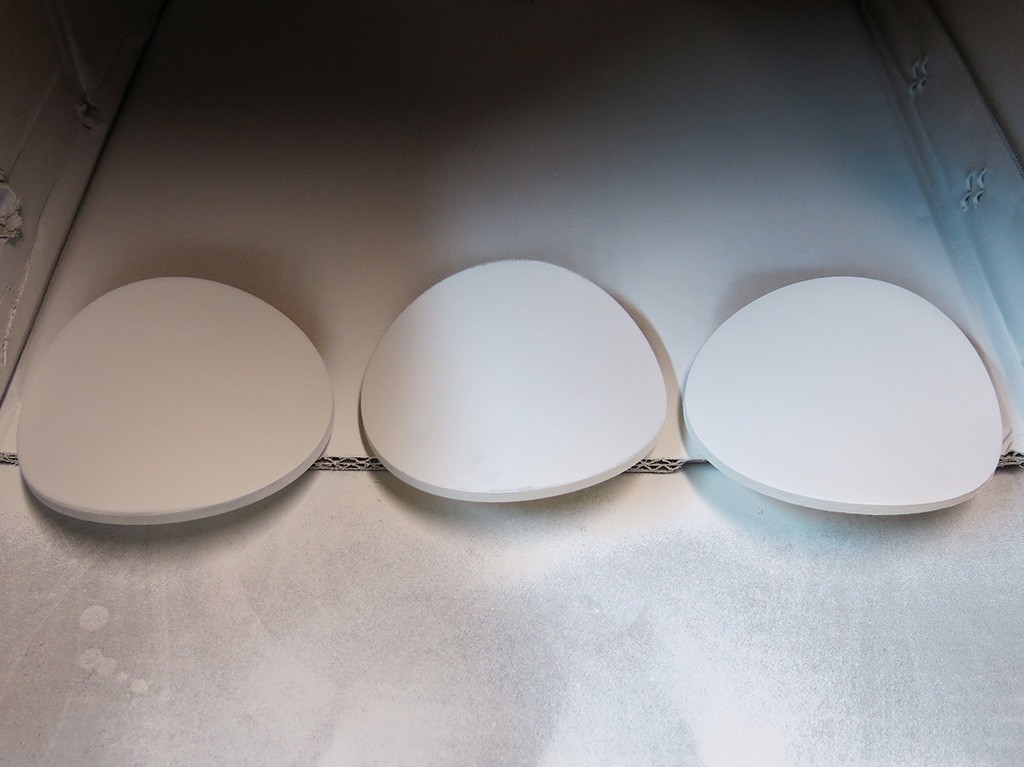
Although we could have chosen any random object, for the sake of simplicity and since we are going to focus on the surface finish, we have created a pringles-like (or saddle point) disc, curved enough to appreciate the characteristic patterns of a 3D printed object (layering effect, etc) yet something that is not extremely difficult to work on.
The materials
In order to achieve the appearance of a final product a smooth, polished surface is required. For that reason, we decided to analyze the time taken by the whole process starting from different printing resolutions. It won’t be a surprise to find out that at some point if the quality is high enough, we may as well skip the hideous and time-consuming sanding step, that would be cool right? Finally, the sample-design was printed on:
- ABS plastic using a professional FDM printer, 178μm layers.
- Polyamide (a.k.a. nylon) using an SLS industrial printer, 60μm layers.
- White resin using a PolyJet professional printer, 28μm layers.
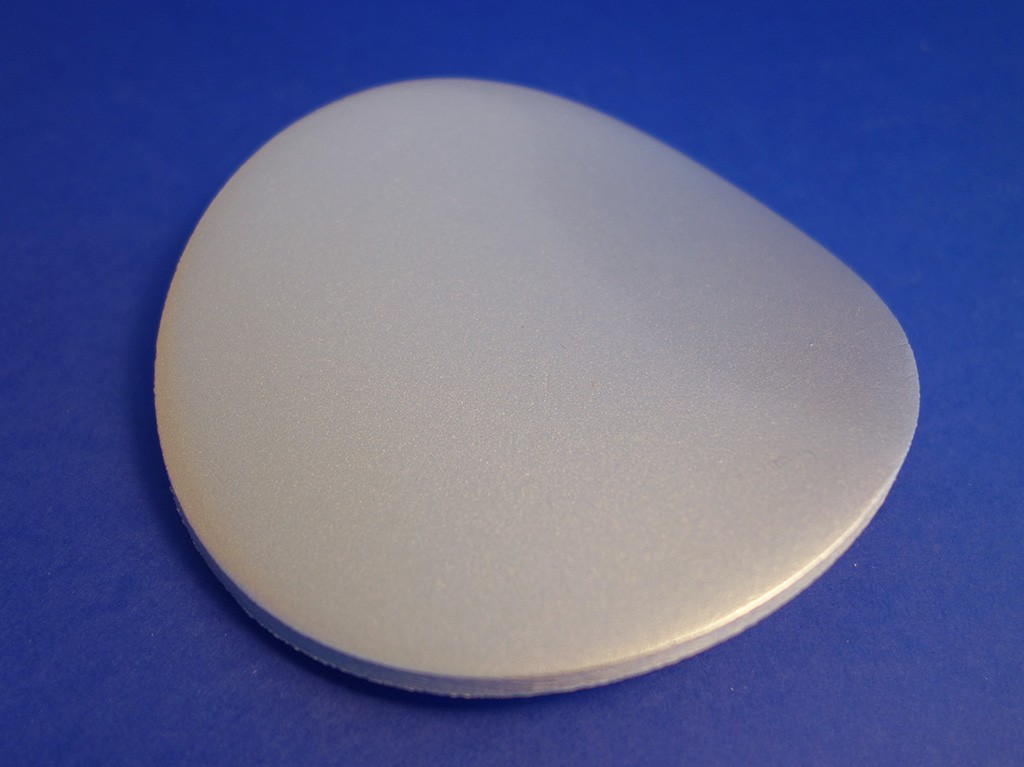
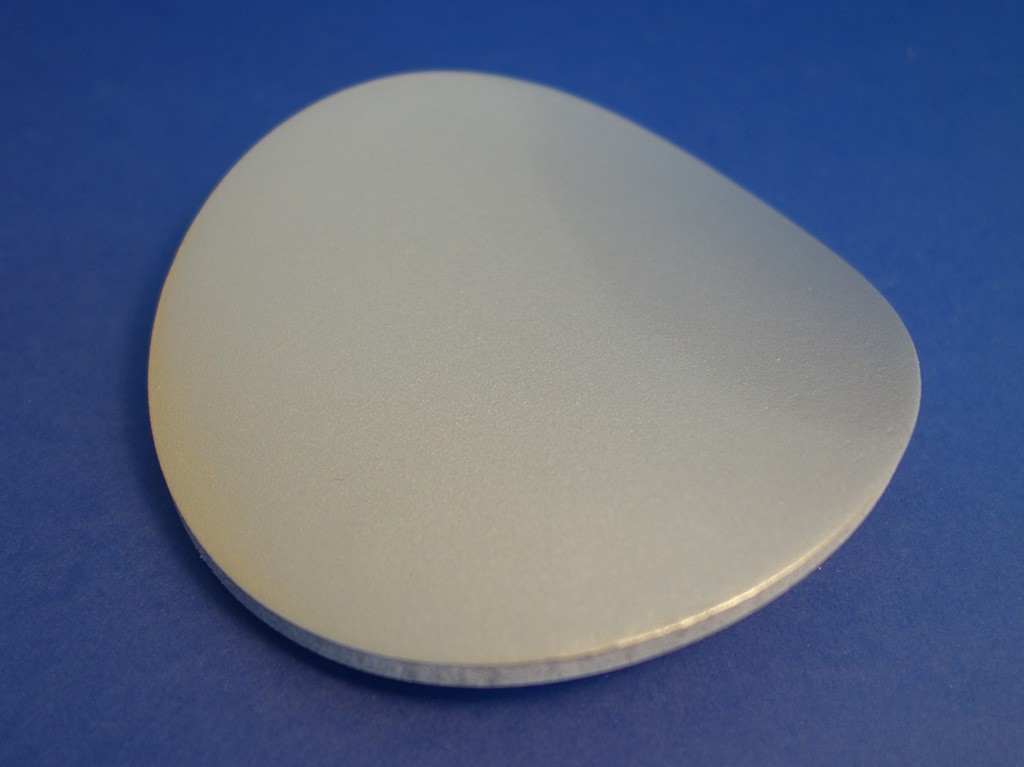
In the following pictures you can observe what the surface looked like right after coming out of the printer, which is the starting point of this project.
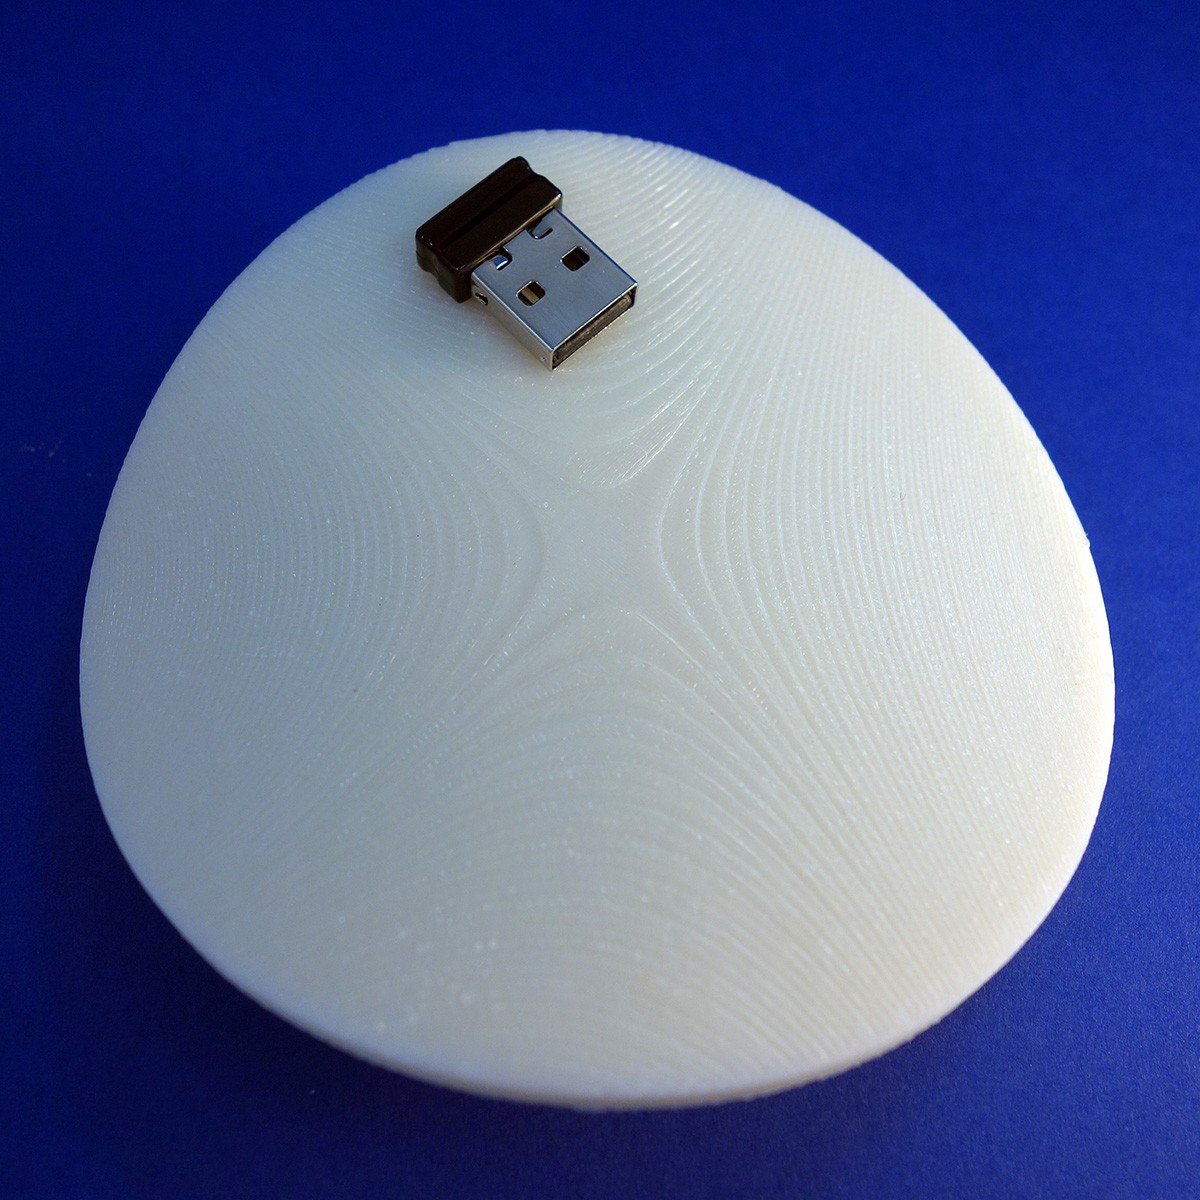

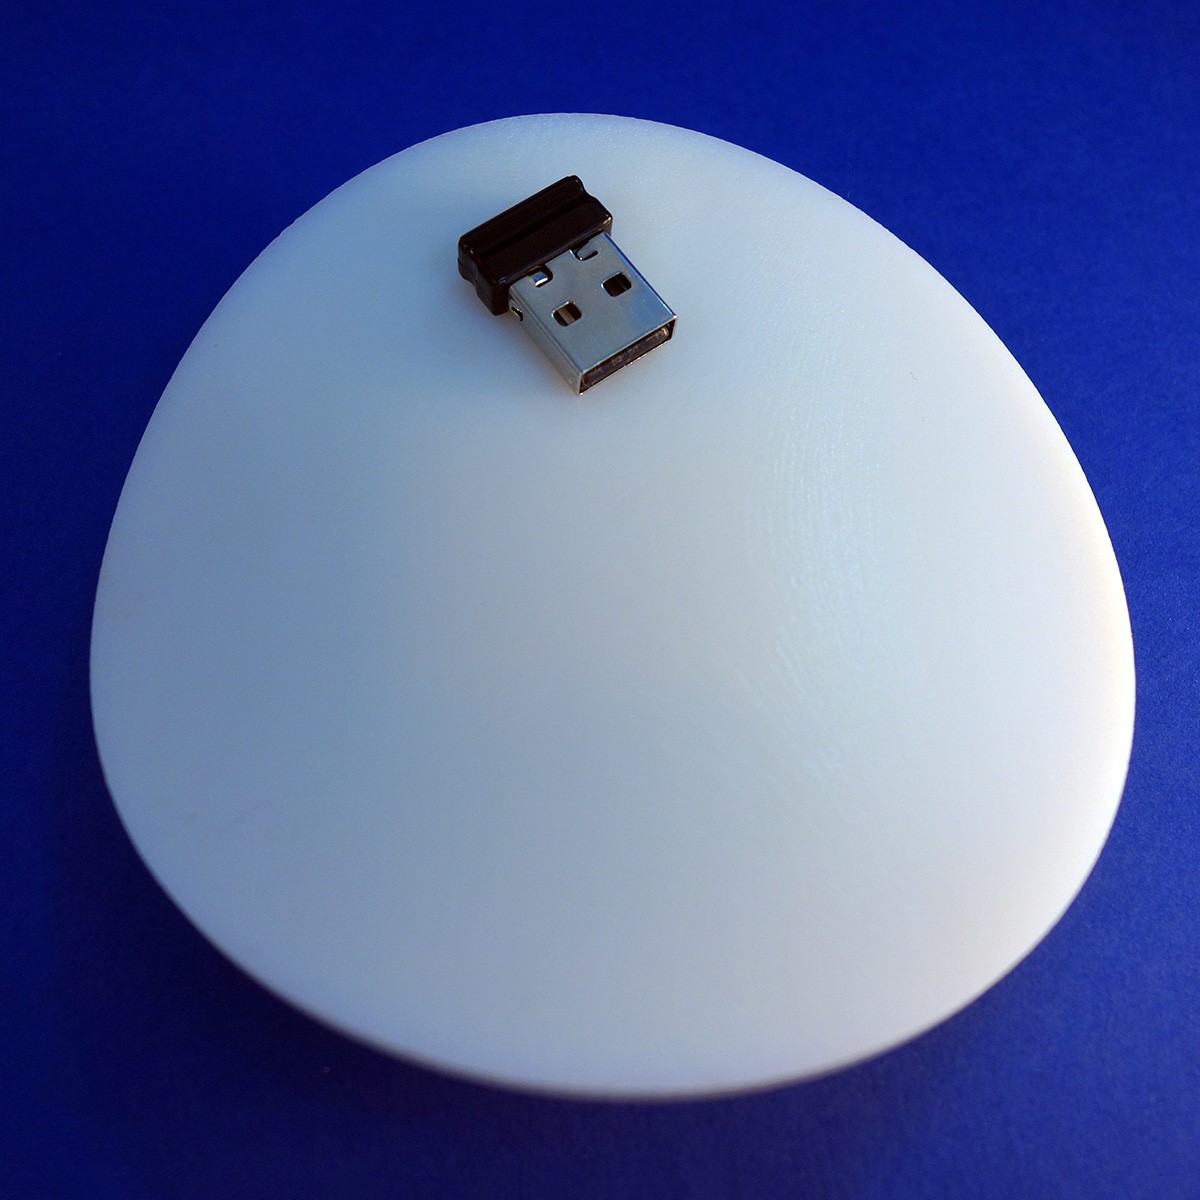
(click to zoom)
(click to zoom)
To get the best finished product aspect, you will also need:
- Sandpaper, most conveniently a set of various grains. You could get something like http://amzn.to/1JvjSEI
- Primer, we used a white color one, but that depends on the final color of your part. Something like http://amzn.to/1KzKXBf should work
- Spray paint
- Glossy/Matte Varnish (optional but recommended)
- Safety mask and goggles

We also decided to use a professional roughness tester to be 100% sure we sand each part just enough to achieve the same surface as the others.
The process to get a finished product look
Smoothing the surface
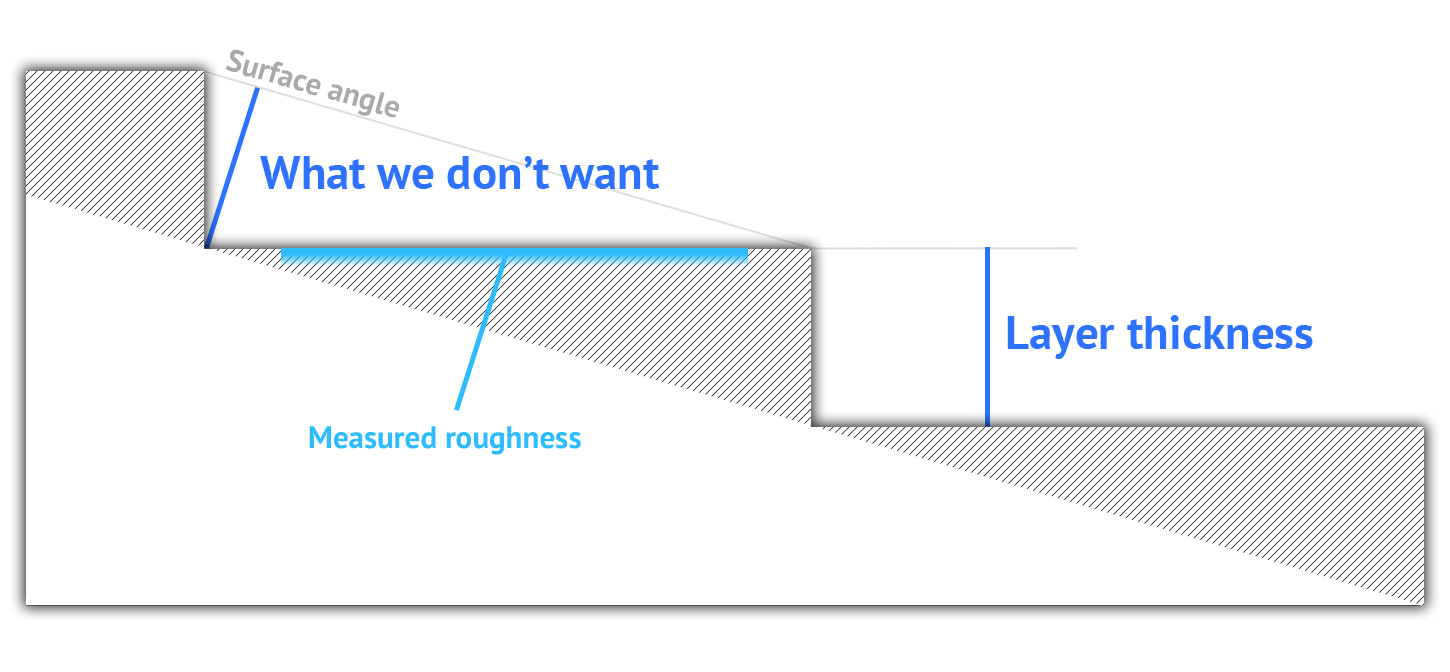
Once all the support material of both the resin and ABS samples was removed, which by itself took almost half an hour on the resin and over an hour on the ABS (Polyamide doesn’t require supports), the first step will be sanding the surface smooth, but right before we start, we measured the initial roughness of the 3 parts. What we got for the mean surface variation (3 measurements each) over a single layer i.e. independent of the step size between consecutive layers, is:
| ABS (178μm layers) | POLYAMIDE (60μm layers) | RESIN (28μm layers) |
| 6.0 μm | 9.0 μm | 1.8 μm |
The way a 3D-printed object feels to the touch comes mainly from the layer thickness (unless you print completely flat objects). With this in mind, we set up to process the 3 samples until they all look and feel pretty much the same, with almost no visible lines and same roughness as the resin object, since it was already paintable.
On the ABS sample, we started with a rough grit sandpaper (180) to get rid of the strong lines. For mild slope angles like the ones we have printed, the amount of material to be removed represents about the same thickness as the layers themselves (or being ridiculously precise Layer_thickness*cos(surface_angle)). This means that doubling the vertical resolution on your 3D printed object will roughly cut the sanding time in half! After the lines were almost gone, we changed to a mid grit sandpaper that left the surface ready for the next step, the primer application. The whole process for ABS took ~31 minutes.
With the SLS 60μm-print this was quicker, and removing the lines and achieving the desired roughness took ~16 minutes since we started right out with the medium grip instead (a rough grip would do more harm than good in this case). Even quicker, with the 25μm resin part we skipped the sanding altogether as the layering is hardly noticeable if visible at all.
In the end, we measured again our results:
| ABS (178μm layers) | POLYAMIDE (60μm layers) | RESIN (28μm layers) |
| 1.8 μm | 1.4 μm | 1.8 μm |
Strong suggestion: both for sanding and painting, always wear a good quality respiratory mask and goggles. It may cost a few extra bucks but your lungs and eyes will definitely thank you!
Primer
As recommended by our white primer’s manufacturer, three four five thin coats were applied with a 10-15min gap in between them. Doing this has several advantages, not only it dries faster than one thick coat but you will also avoid paint runs that will take even longer to deal with. In this case, the surface is relatively small but as a general rule, always use your spray along vertical or horizontal lines while keeping a constant distance to achieve a great primer (or paint) deposition. A few hours after the last coat, an 800 grit sandpaper was used to smooth the surface even more and eliminate any imperfection that could have appeared during the primer coating.
At this point, all the parts look and feel the same to the touch and it was not even possible to distinguish them without turning them upside down to see the material beneath.
Painting & Varnishing
Afterwards, we applied several thin layers of a metallic effect paint followed by a glossy varnish, always waiting at least 10 minutes between one coat and the next one to be sure we paint over dry paint. For best results on these final steps, and especially for big objects, remember to move your arm and not your wrist while painting and try to start and stop the trigger outside your 3D printed part or you will get an unpleasant glob of paint. If something like this happened, it’s not the end of the world but it will require some time for it to dry completely, then sanding the area and painting it again.
Results: 3D printed parts with a great finished product look
At the end of the day, we had all the objects with a metallic gray that resembled a car paint job, at least at a normal view distance. Under really detailed inspection it was possible to spot a few imperfections here or there but it wouldn’t affect the overall look of the surface. Just as before, it was impossible to tell the 3D printing material of each 3D printed part, as the polishing, primer and painting job were done to get the same result.

If this was a real finished product, with all its sides painted and it was shown to us for the first time, we could safely say that we have 3 copies. Since we did this job, it would be unfair to say they are the same, as we know the time we invested to get the final result in each case. The primer and painting processes take the same amount of time regardless of the 3D printing material, but it also not that demanding, as it was just a couple of minutes every 15 minutes or so, while we could be doing anything else. The polishing process was a whole different thing though, as even for such a compact and simple surface it took a lot of time to get the finished product look we wanted for our 3D printed parts.
Unfortunately our ABS printer could only print with 178μm layers, which is easily exceeded by other ABS printers but with this resolution, it took a bit more than half an hour of serious sanding for a 12.5 square inch surface. On the other side of the spectrum, with the usually more costly resin 3D printing we could skip the polishing altogether, leaving polyamide somewhere in the middle. The amount of work required for a project like this boils down to a compromise between spending some more money on 3D printing and saving some sanding-time later on. After this experience, it would be easy to estimate how much time one could save depending on the size (surface actually) of any other 3D printed part, and know if it is worth a high resolution 3D printing.
As a side note, those 31 minutes mentioned above may have been more as we overestimated the primer filling capacity and we ended up with some subtle lines on some parts of the ABS object. Of course, this was nothing else than our fault but perhaps with only 5 extra minutes, the result would have been perfect. Despite this, nobody in the office though these parts were 3D printed at all, and we consider that a complete success!
Feel free to try to get this finished product look for your 3D printed parts and to share it with us!
Finally, if you enjoyed this post remember you can also learn some other tricks and techniques here for multicolor prints and here for polyamide! You can also discover our special selection of 24 free CAD programs!