3DS Max Tutorial: 3D Modeling for 3D printing with 3DS Max

Summary​

1. Create a model for 3D printing with 3DS Max

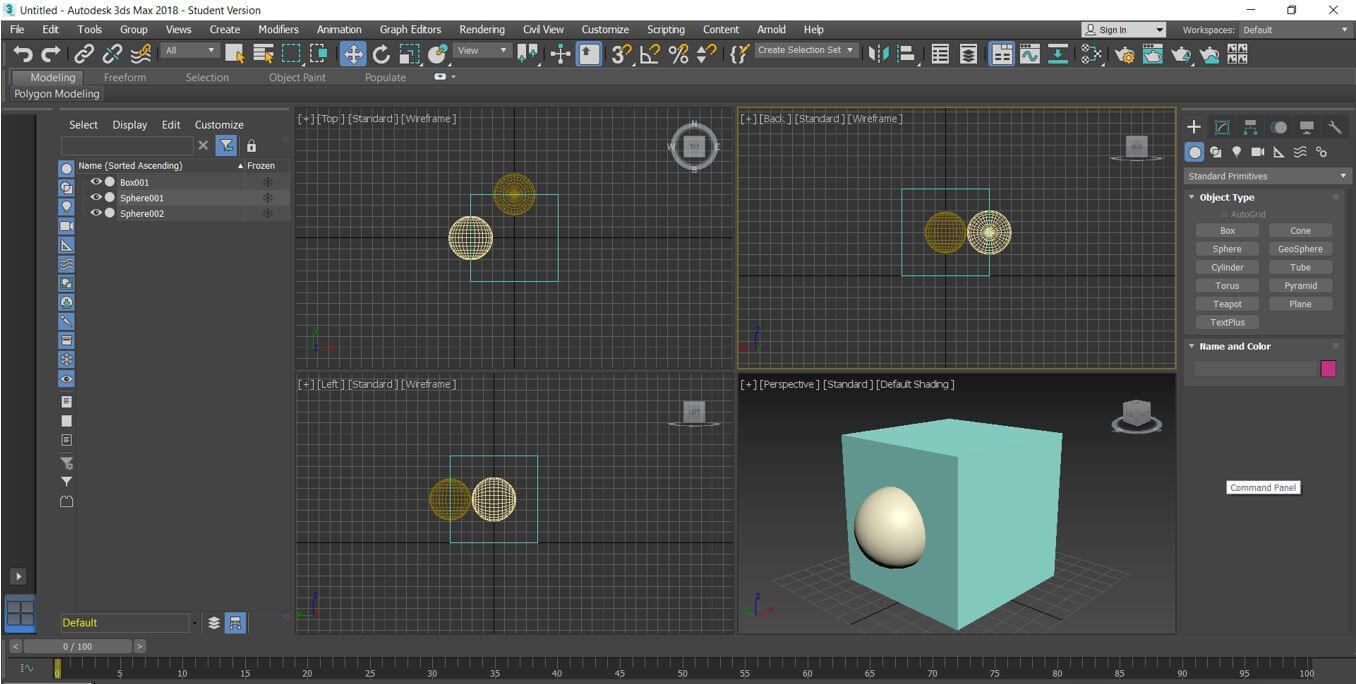
One of the first particularities of 3DS Max that you will notice when you will use this software for the first time is the multi-view. Once you’re in the software, four views are configured to make an overview of the scene and of the object that you are going to create. 
A good configuration is important to guarantee a stable project, that you can check easily. 

Indeed, we can see all the manipulations and their effects on the object, to avoid unpleasant surprises during the finishing.
 1.1.1_WIK9y0d_U3rzyGS.jpg


Don’t panic, interpretation can take a little time!  Here, the second ball at the back of the cube is not visible on the 4th view but is figured out thanks to the three others. 

If you’re beginning with 3DS Max (or modeling software in general), we advise you to avoid orthographic views (you can configure it on each window). This one can lead to bad decisions if the user is not used to the projections of this type of view.

 1.1.2_X9LvWSC_7HiuuOE.png

 An example of the differences between orthographic/perspective view.

Don’t hesitate to go from one view to another during the creation of your model to improve the precision of your object, and to make it match to your needs.

Like in all modeling software, it’s important to check the scale and measures used by the software before modeling (you can go to Customize => Units Setup). 

Webp.net-resizeimage (9)_fGoflqi.jpg

A tip that you must keep in mind during the creation of a model for 3D printing is to place a box with the size of your final model, in a corner of the work environment. Then, you can refer to it during the 3D modeling process, to be sure to get the right dimensions for your object.

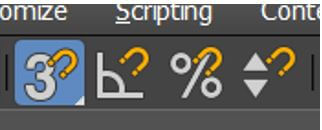
If your model has defined and fix angles or measures it is possible to use the magnetism of the 3DS grid to ensure the hegemony of the model on those specific parts. 

1.1.4_E1uEsZd.jpg

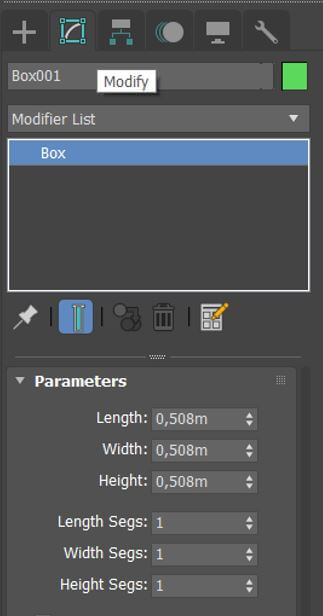
Otherwise, dimensions can be manually entered in the menu “Modify”, like the coordinates of the origin/center points (in the line under the work space).

1.1.5_NgbXHih.jpg

1.1.6_SIOpXEg.jpg

The easier way to create a clean 3D model, without complicated designs, on 3DS Max is to use one of the tools of the Create tab. In this menu, it is possible to generate models with primitive shapes combination, but also to draw with curved lines and splines, and then refine them.

For the primitive shapes, a lot of parameters are available during the generation of the shape, like dimensions, different radius, the precision of the meshing (and its definition) or the position of the center of the part.

Those shapes are easy to generate and to assemble. With a little bit of experience, you will be able to use it very easily, and know which method to use to model your objects. 

Modifying those shapes is easy with the “Modify’ tab, and thanks to the use of Modifiers

The difference between 3DS Max and the other 3DS software is the quantity of tools available to modify your model. Those Modifiers are allowing all the traditional transformations (like extrusion or chamfers) and make some exotic tools available for the user (fractal deformations, for example).

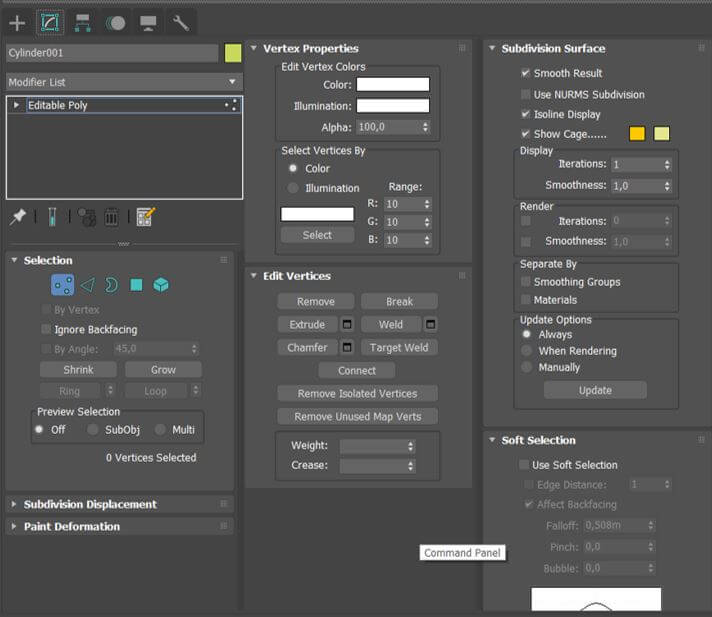
For meticulous users, the Edit Poly tool is obviously the tool that you need to use. Alone and well used, it is possible to obtain the same results than with other Modifiers (with combinations).
1.1.7_uqvFIJA.jpg

The option list will depend on the selection (vertex, edge, polygon) you are actually working on.

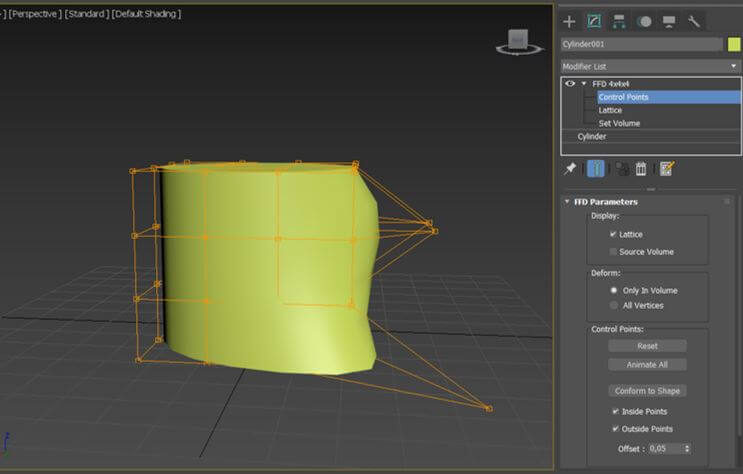
Another useful functionality: you can modify the FFD (Free Form Deformation) which allows to mark the deformation’s handles on the objects, according to the precision that you choose. It is useful to make sure that the modifications are locally homogeneous, according to your choices.
1.1.8_moxq1OZ.jpg

In addition to the different formats that you have, it is possible to choose your own FFD precision.

Try by yourself the effects of all those Modifiers on your object. It is better to do it step by step, to see the effect of each one, and to go back if you have a problem with your 3D model. 

You have to use the modifiers on polygons but not on primitive shapes (you’ll see it in the next part).