 Connect with Google
 Connect with Facebook
Reducing the 3D printing price with hollowing: Our best tips for a successful result
Posted By Marianna Papageorgiou on Dec 29, 2017 | 0 comments
The 3D printing price depends on a few factors. Among them are the 3D printing materials that are used, the 3D printing finishes applied, and of course the amount of used material. The less 3D printing material used, the lower the 3D printing cost will be. You can optimize your 3D file to do so. For that, we offer a set of tools, such as Hollowing, Batch Control and Customized Orientation, that help the users of Sculpteo’s online 3D printing service to have the best customer experience and achieve the best 3D printing result.
In this blog post, we will go through the hollowing procedure and give you valuable tips about how to hollow successfully your 3D models before printing them, and save material, time and 3D printing price.
What is hollowing?
Hollowing is a procedure that allows to create holes in the 3D model that will be produced out of 3D printing. Hollowing is applied to the powder-based 3D printing technologies, such as SLS (Selective Laser Sintering), Multi Jet Fusion or ColorJet. These holes serve as a way out for the remaining powder inside the 3D printed part.
By hollowing a solid 3D model, you reduce its volume. This procedure saves material and consequently reduces the printing time and reduces 3D printing price. Moreover, as a hollowed model consists of less material, less heat is generated during the printing process. This is also an important benefit of hollowing, as less heat leads to a more stable process and reduces the potential risk of deformations in the printed objects.
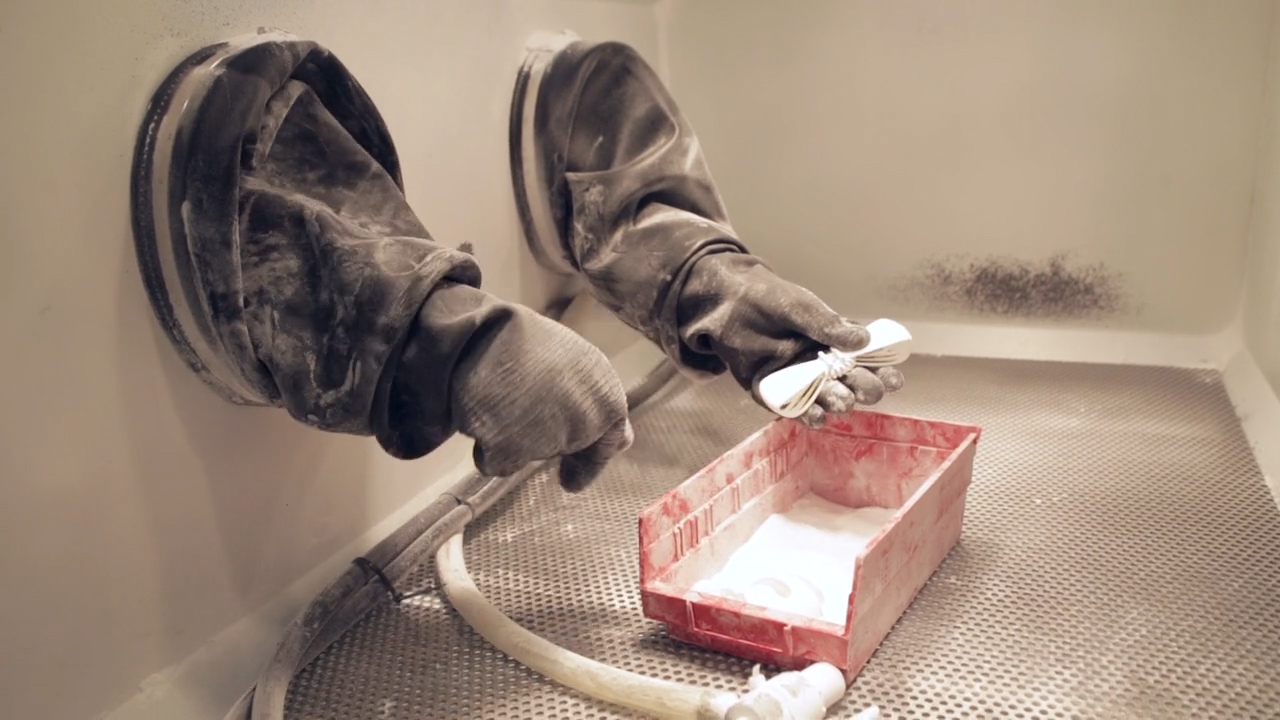
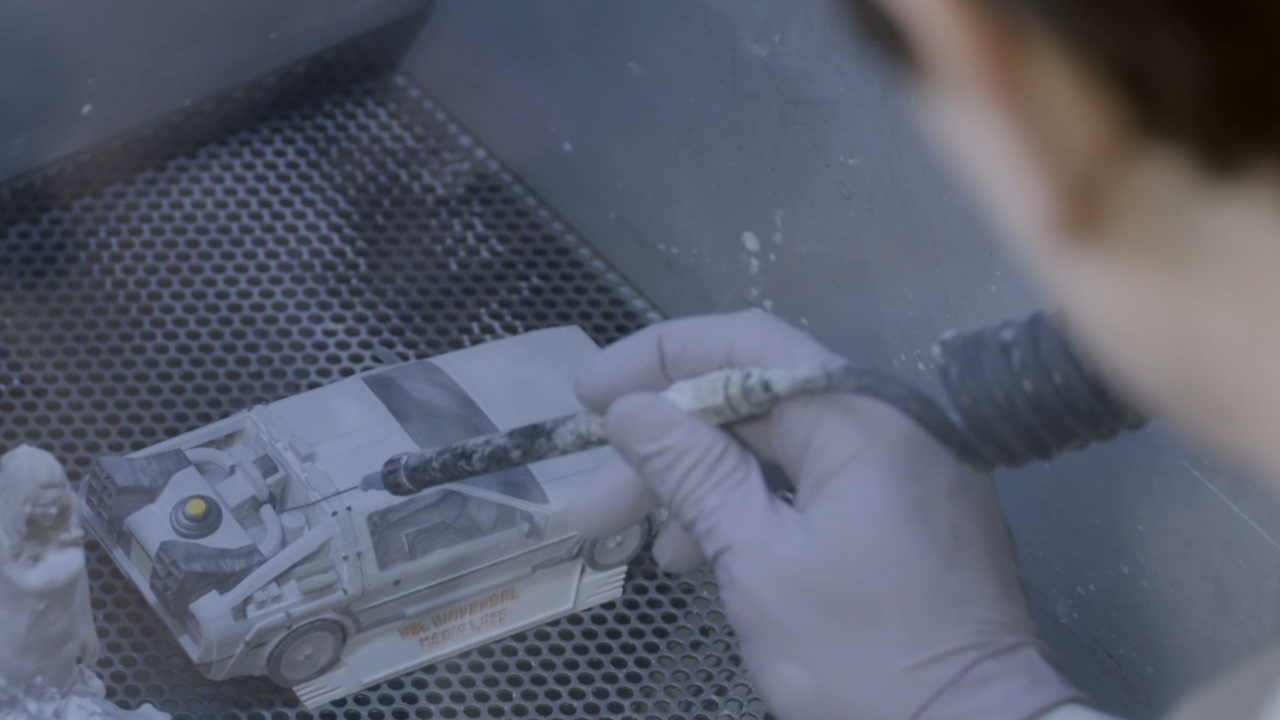
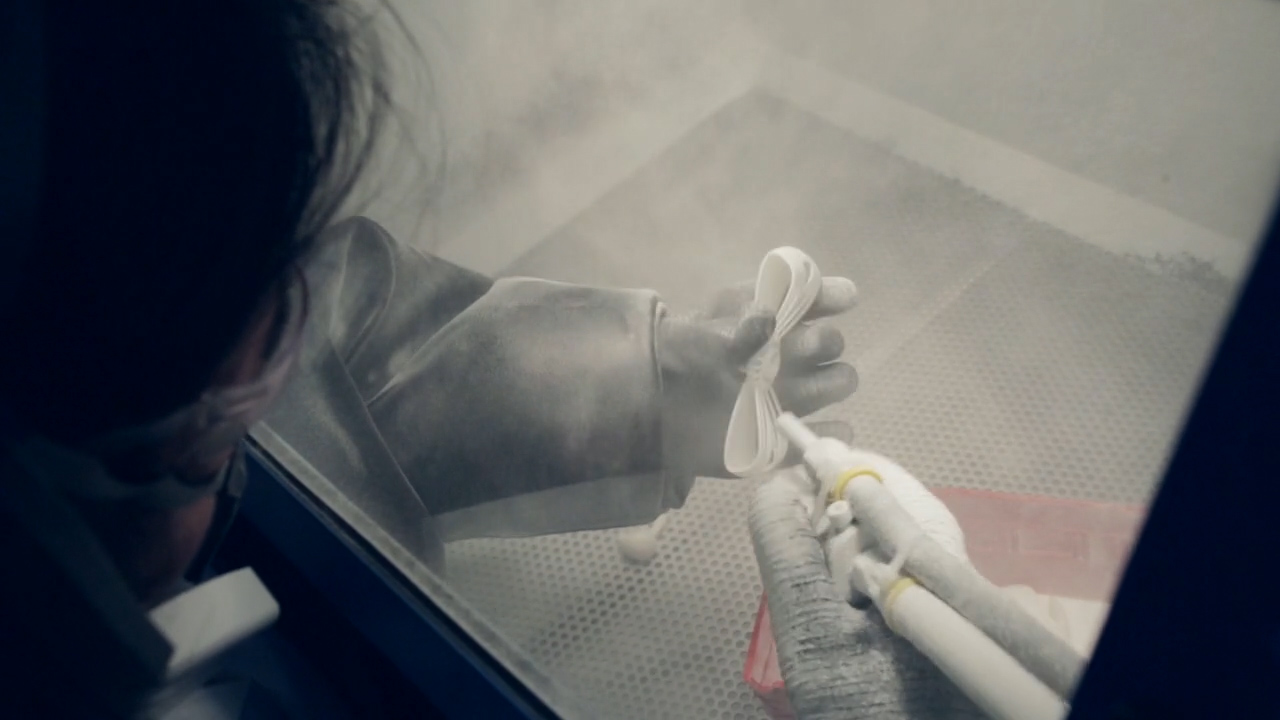
How is the powder removed out of the hollowed objects?
After your 3D model is 3D printed, it goes through some post-processing by our specialized technicians. The procedure that it goes under, is called sandblasting. With the sandblasting tool, the technician blasts air and powder (sand) in the inside of the holes, so that the excess of powder gets off.
Why should you hollow out your 3D model?
As we explained above, hollowing your 3D models helps you save material, time, money and achieve a more stable process. But it’s not only for your financial benefit that you should hollow out your 3D model. It is also a practical solution for making your 3D part lighter. If there is remaining powder inside the printed object, it is obvious that it will be heavier than expected. Moreover, trapped powder makes the dyeing process difficult or even unsuccessful. Once immersed into the dyeing tank, the trapped powder inside the object, will come out and stick to the outer surface. This will make the result granular and rough. Moreover, when parts with excessive powder are being dyed, the powder gets wet and it doesn’t absorb the color at the same speed than the rest of the surface does. As a result, it takes longer to dry, which may lead to color alterations in different zones of the part, especially around the escape holes.
That said, it is very important that when the parts are removed from the 3D printers, they are cleaned off properly.
How to hollow your 3D model
There are various alternatives that you can use to hollow your options. The first one would be to do it manually, by using a 3D modeling software. The other way, is to use our online hollowing tool, which is available on Sculpteo’s online platform after uploading your 3D file.
Using 3D modeling software to hollow out your 3D models
As said, you can use a 3D design software of your choice in order to hollow manually your 3D models. Each 3D modeling software, includes several hollowing tools that are specifically meant for this purpose. A simple way to use these tools in order to hollow out your model is to select one of its surfaces and extrude it inwards. This, will scale down your 3D model and create a void on its inside. In other words, the exterior of the 3D model will not change, while the interior is hollowed.
Doing the hollowing during the 3D design procedure is a very smart way to eliminate most of the volume of your 3D model. It gives you the freedom to customize your design to the needs of the technology used for 3D printing. You can always change and adjust your 3D model accordingly, by using the available hollowing tools of the 3D modeling software you are working on.
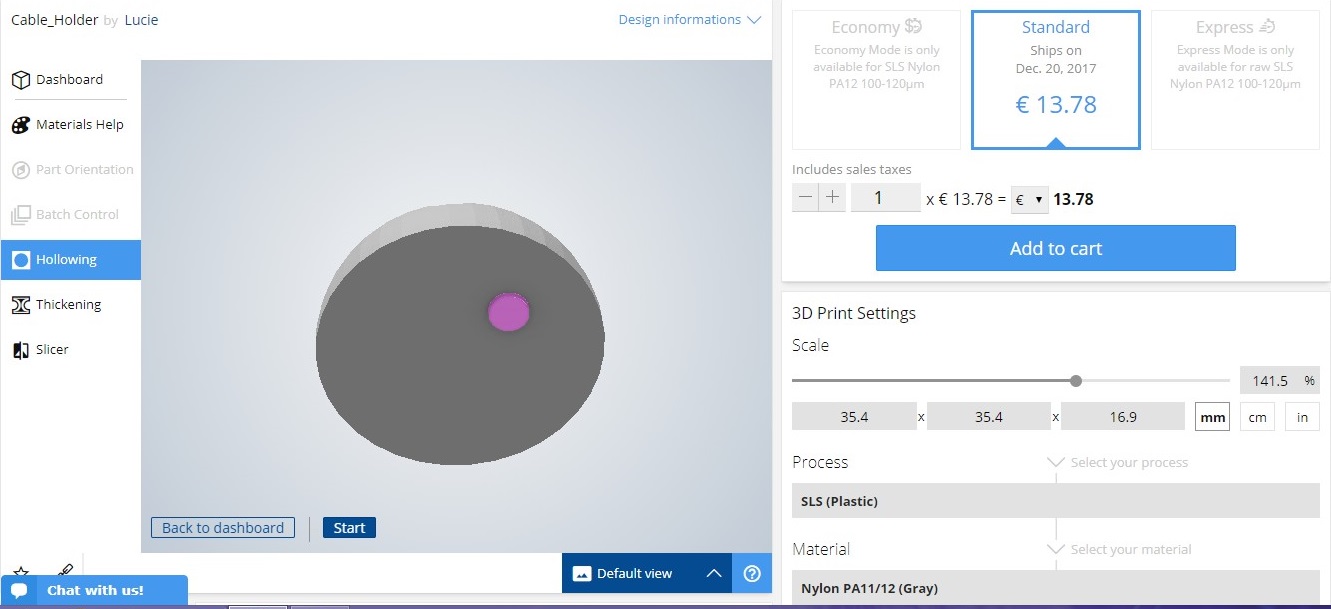
Using Sculpteo’s online hollowing optimization tool
With Sculpteo’s optimization tool for hollowing, you can hollow your 3D model when you upload your 3D file on our platform. It is a fast and simple way to hollow your models, even if you don’t have any skills in 3D modeling. With this feature, hollowing gets easier than ever before! All you have to do is upload your design, and select the technology and material you want to use for 3D printing. Sculpteo’s hollowing tool is available for powder-based 3D printing technologies, which are: Selective Laser Sintering, Multi Jet Fusion or ColorJet. Thanks to its user-friendly interface, you can click on the selection of the hollowing option, and place on the surface of your choice as many holes you think your 3D model needs to be printed successfully.
With using our tool, not only you remove the unnecessary material out of your 3D printed part, but you also significantly reduce the price of your 3D print.
In this page, you can find detailed information about how to use our hollowing tool. In addition, you can have a look to the following video that visualizes step by step how this feature works:
How to hollow properly your 3D models: Our best tips
Hollowing is a valuable tool that can guarantee the success of the 3D printing result if done right. That said, we will share with you some of our tips related to hollowing that we have learned from our experience in 3D printing.
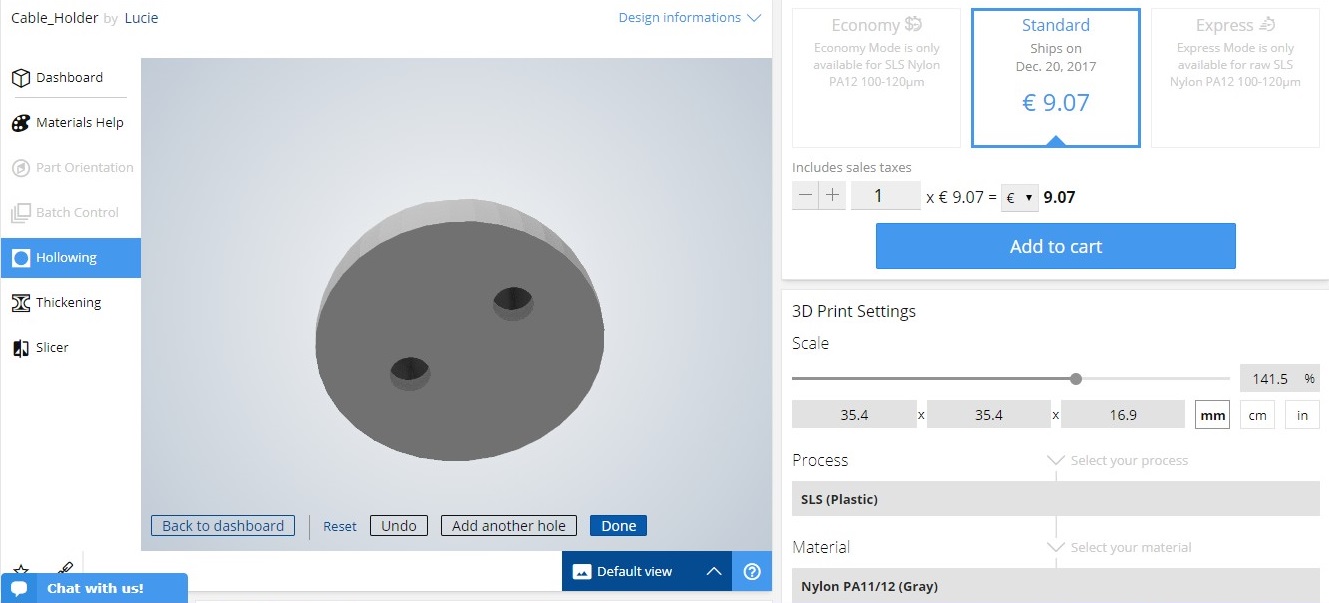
Place two or multiple holes on your 3D model
The first and most important advice that you need to follow is to place more than one hole on your 3D model. The powder that circulates inside the 3D part cannot escape from just one side. It needs at least two holes for the sandblasting tool to reach all the edges of your 3D printed part.
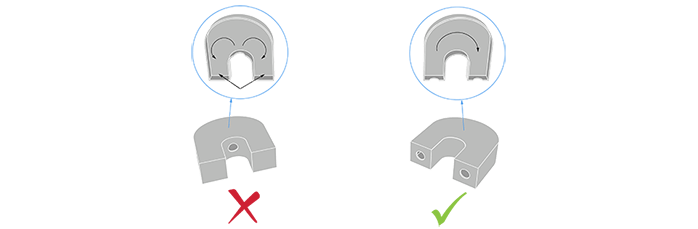
For simple objects, sometimes two holes are enough. If your model consists of more geometrically complex elements, such as curves, enclosures or bulges, don’t hesitate to add more holes. In this way, you guarantee that there will be no trapped material in the inside of your printed object.
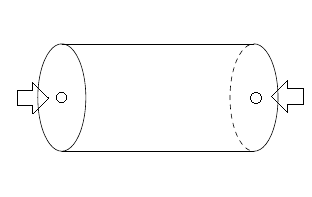
Mind the position of the holes
Placing two holes one next to the other, is pointless. There should be quite some distance between the two (or more) holes, letting the powder circulate at the interior of the part. Preferably, place your holes near edges or zones that are far from each other. Think of the example of a cylinder-shaped object. In order to be hollowed properly, there should be one hole on one flat surface, and the other hole on the opposite side.
Select the proper surface for placing the holes
Not all the surfaces of an object should be hollowed. If the 3D printed part is decorative, the holes should not be placed on a surface that influences its aesthetics.
A tip that applies to most of the cases is to place the holes on surfaces that will not be visible, such as at the bottom of the 3D models.
Take as an example a 3D printed figurine. It should not be hollowed anywhere else but at its bottom. In the case that the 3D model has some functionality and it is not purely decorative, holes should be put in a place that do not affect its usability.
Mind the size of the hole
A hole with diameter 5 mm is the minimum size that should be applied when hollowing. Though, the bigger the diameter of the hole, the better and more efficient the cleaning of the excessive powder will be. Big holes mean that the sandblasting procedure is more effective. The sandblasting tool reaches deeper the inside area of the 3D printed part, and cleans-off all the hidden corners.
Which 3D models cannot be hollowed?
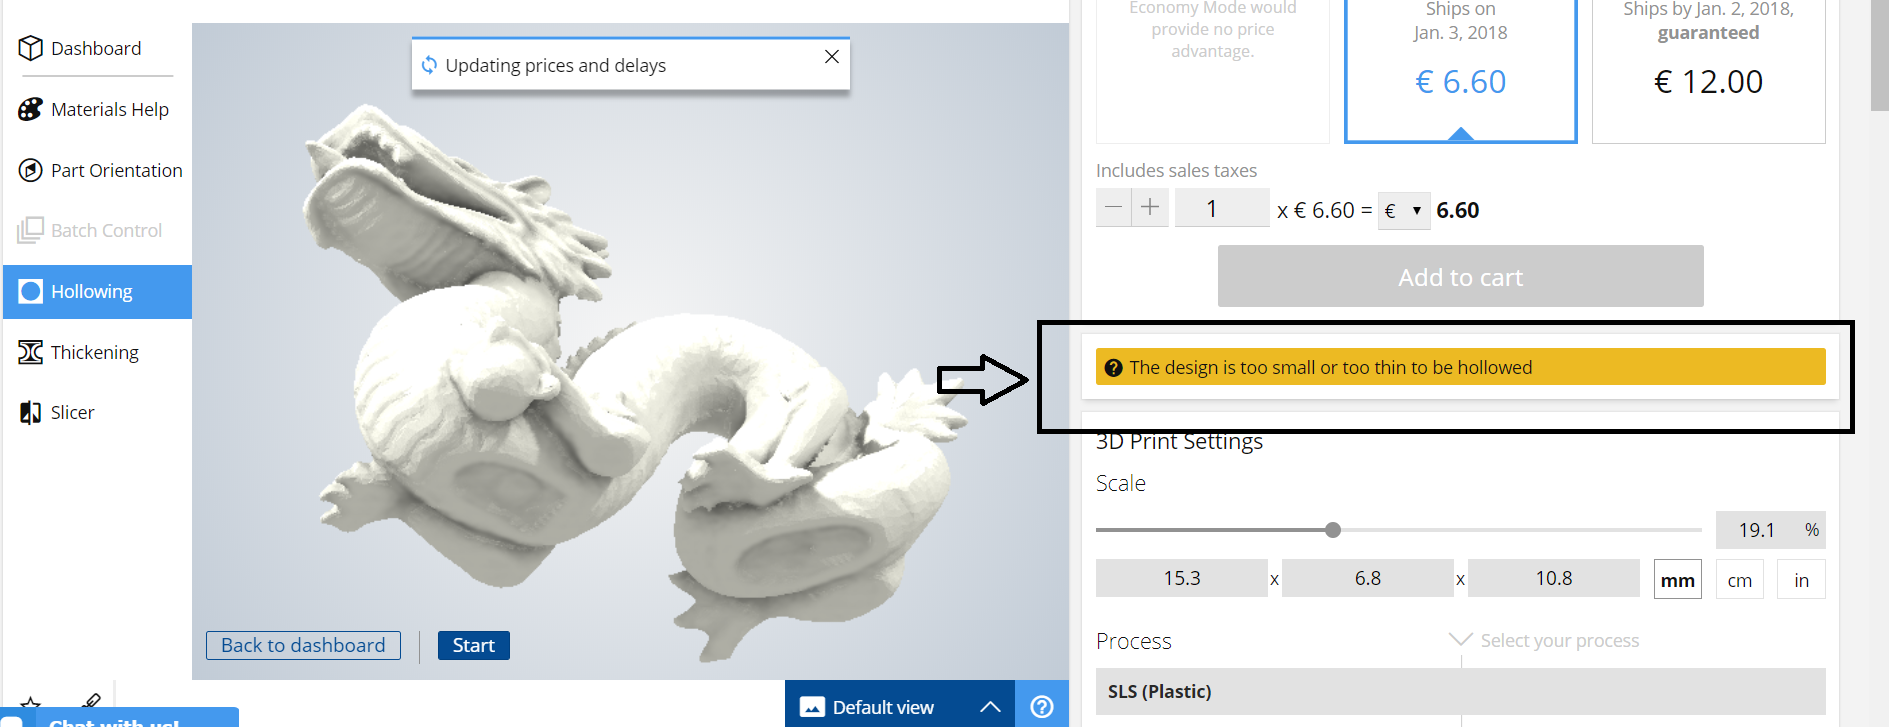
If your objects are too thin or too small, they cannot be hollowed.
This happens for two reasons. First, because it doesn’t require an important quantity of material. Thus, there is almost no chance that there will be excess material that needs to be drained out.
Moreover, as usually thin objects are fragile, adding a hole to their surface can make them even more vulnerable to the point of breaking.
To make it easier for you, you can check if your 3D model can be hollowed or not with Sculpteo’s online hollowing tool. If it cannot be hollowed, you get an instant notification about it.
Hollowing and wall thickness
As we explained above, hollowing affects the strength of the part, especially if the 3D model itself is fragile. The same rules apply to wall thickness: a very important parameter when designing for 3D printing. A part with very thin walls may break if it is hollowed. So, when you hollow your 3D model you should pay attention to its wall thickness. There are two solutions to this problem.
One solution would be to increase wall thickness to the point that your part can resist hollowing without running the risk of breaking.
The other solution would be to keep the thin walls, but add an internal structure to your 3D model. This will help the model to have better support. For example, a lattice structure, could help you optimize your design. With these internal structures, your design is not totally solid, but at the same time it is supported in a way that can be 3D printed successfully and won’t break during post-processing.
We hope you take good advantage of these tips and you create successfully hollowed 3D models! If you are striving to get the perfect 3D printed result, you can always trust our material pages. They include all the information you need to know, from design guidelines to properties of the material itself.
If you want to become an expert in 3D design for 3D printing, you can download our ebook for free! It will teach you all the hacks for making the perfect 3D model for 3D printing.
Moreover, you can find very useful tips about various design issues, in our recent blog posts about: