When you’re done modeling and you are satisfied with the model you have produced, it means you are ready to prepare your .stl file for 3D printing.
What you have modeled so far with Inventor is a solid component, with mathematical data that needs to be translated into a ‘mesh’, made of polygons, vertices, and edges, in order to make it understandable for a 3D printer.
It’s important to be sure about every detail of our model before ‘meshing’ it, as the .stl file produced won’t be easily modifiable. So check wall thicknesses, clearances, and all the other parameters related to the material you would like to use for your print.
To translate your file into a mesh, access the ‘3D Print Preview’ environment by clicking (  )>Print>3D Print Preview.

A new window will open on your screen, showing your meshed model, with a specific toolbar that allows you to check and change some features of your mesh before exporting it.

Let’s see what kind of information we can access through this toolbar, starting from the right side.
 defines the size of your file in its actual state. This value is related to the number of polygons (Facets) in the model, so the higher the number, the higher the size of the file. We recommend to keep the size of your model under 50 MB in order the make it easy to handle for our systems.
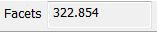 displays the number of polygons in your model. This number defines the surface definition of your printed object, so a higher number of facets will result in a smoother surface, closer in definition to your digital design. We suggest to set 1,000,000 facets as the absolute upper limit in your mesh in order to keep the file under 50 MB and easy to handle. Anyway, after some years of 3D printing, we can truly say that this limit is way higher than what is actually necessary to have the smoothest surface quality at this scale, as there is no visible difference in surface quality over 250,000 facets. Aiming for about 300,000 facets is a good compromise to ensure a great surface quality and a light, handy file.
 will close the current 3D Print Preview.
 gives you access to the most important part of this preview, the ‘STL File Save As Options’ window.
The format of the .stl file can be left as Binary, and the default units will be the ones used for modeling.
The ‘Resolution’ part of the window provides us with some options to define the quality of our mesh (And consequently its size). You can choose between 3 default settings, ‘High’, ‘Medium’ and ‘Low’, or a custom one.
Every time you choose one of these settings, press ‘OK’ and look at the preview window to see how your model has been affected by the change (Checking ‘Facets’ number), it will update in a few seconds.
Try first with the default settings, then if none of them fits your needs, go with the custom one. Try changing the ‘Max Edge Length’ value (Max length that every polygon’s edge can have) and leave the others unchanged.

The ‘Show Facets Edges’ button (  ) lets you visualize how the object is meshed on the viewer.
When you have found what you think is the right configuration for your model, you can press ‘Save Copy As’ (  ) to export your object as a .stl file, ready to be uploaded to Sculpteo.
 Connect with Google
 Connect with Facebook

